This article will give step by step instructions for updating the ScriptX Orchestrator Port to load on Port 41191. Sometimes when ScriptX is installed it will load to Port 41192 which will cause errors with printing in Badge[on]Demand. Any user can update the port and clear these errors.
Wrong Port Error:
Option 1 - Using Windows PowerShell
Step 1: Search for Windows PowerShell in the Windows Search Bar:
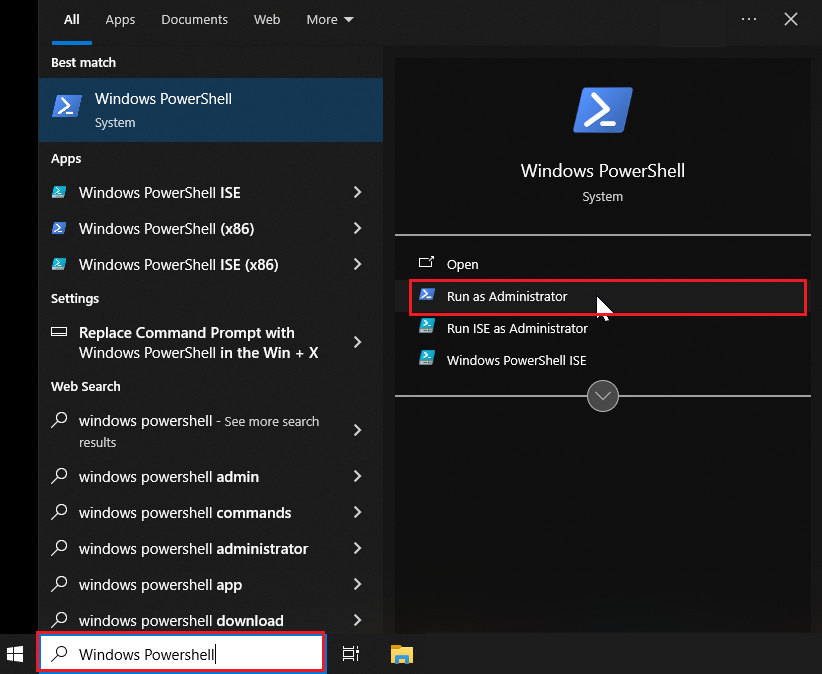
- Select 'Run as Administrator' - This will launch the Windows PowerShell Application.
Step 2: Copy the below code into the editor panel and press Enter
# Define the path to the JSON file
$jsonPath = "C:\Users\Onsite\AppData\Local\MeadCo\ScriptXServices\appsettings.json"

# Read the JSON content
$jsonContent = Get-Content $jsonPath -Raw | ConvertFrom-Json

# Set the port value
$jsonContent.ServerHost.Endpoints.Http.Port = 41191

# Save the modified JSON back to file (formatted output)
$jsonContent | ConvertTo-Json -Depth 10 | Set-Content -Path $jsonPath -Encoding UTF8

# Restart the computer with a delay and a message
Write-Host "Restarting the computer in 10 seconds..."
Start-Sleep -Seconds 10
Restart-Computer -Force
- This will run the script to update the
appsettings.jsonfile to use the correct port automatically. - The script will also force a restart after 10 seconds.
Option 2 - Manually Update File
Step 1: Open the Configuration Folder
-
Press
Windows + Ron your keyboard to open the Run dialog. -
Type the following path and press
Enter%LOCALAPPDATA%\MeadCo\ScriptXServices - This will open the folder containing the
appsettings.jsonfile.
Step 2: Locate the appsettings.json File
-
Right-click on
appsettings.jsonand select Open with > Notepad.
Step 3: Edit the File to Set the Port:
- Locate the line of JSON with the Port listed. Edit the port to be "41191"
-
In Notepad, click File > Save.
-
Close Notepad.
Step 5: Restart Your Computer
- To apply the changes, please restart the computer.
This knowledge article provides information on specific Expo Logic features. To ensure continuity with documentation and product functionality, Expo Logic reserves the right to amend or update this knowledge article as needed. For more information, reach out to Expo Logic Support.
Comments
0 commentsPlease sign in to leave a comment.